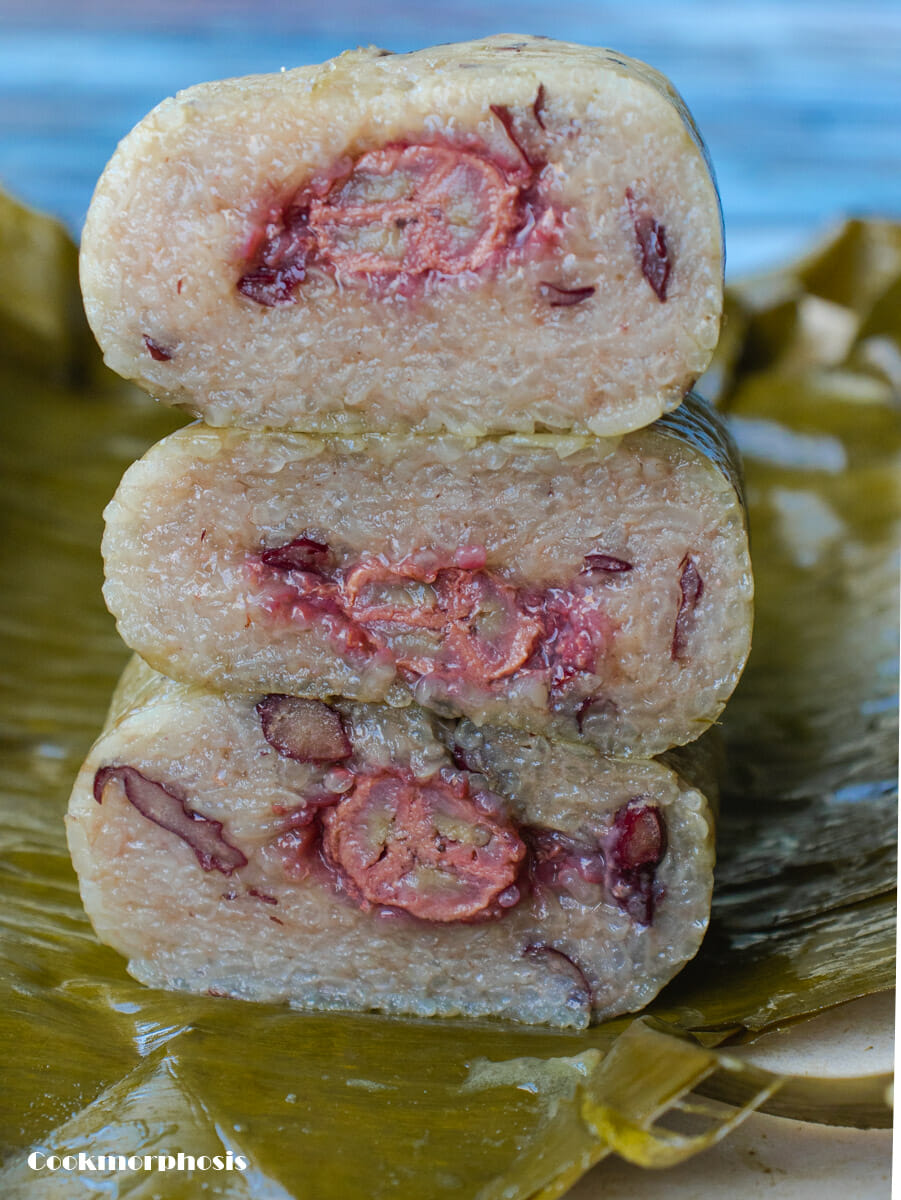
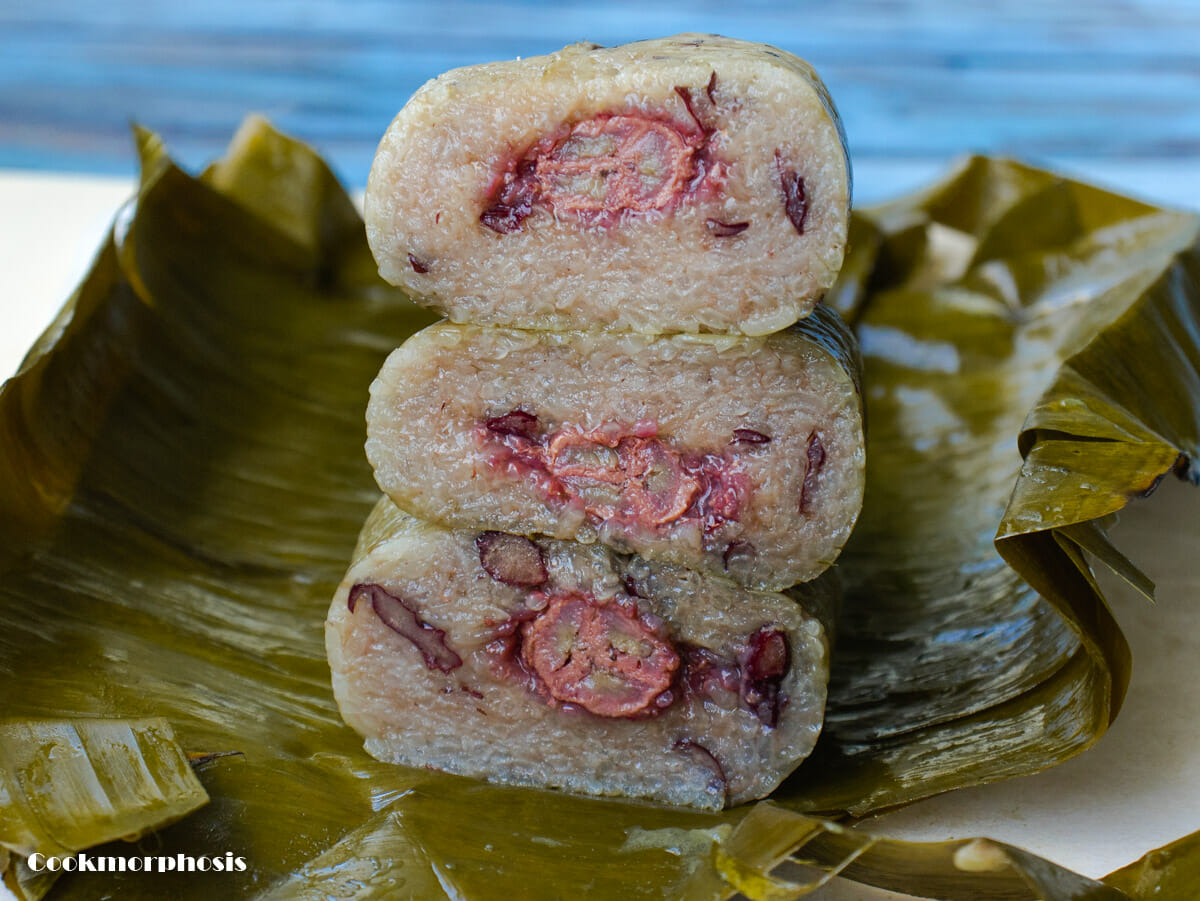
Glutinous rice banana cake (Bánh tét chuối) is a traditional Vietnamese holiday cake. Though it is somewhat complicated to make, its one-of-a-kind banana flavor and sticky texture are worth the time and labor. Not to mention this Bánh tét chuối is 100% vegan friendly. Let's learn more about the famous holiday food with this how-to-make banana cake guide.
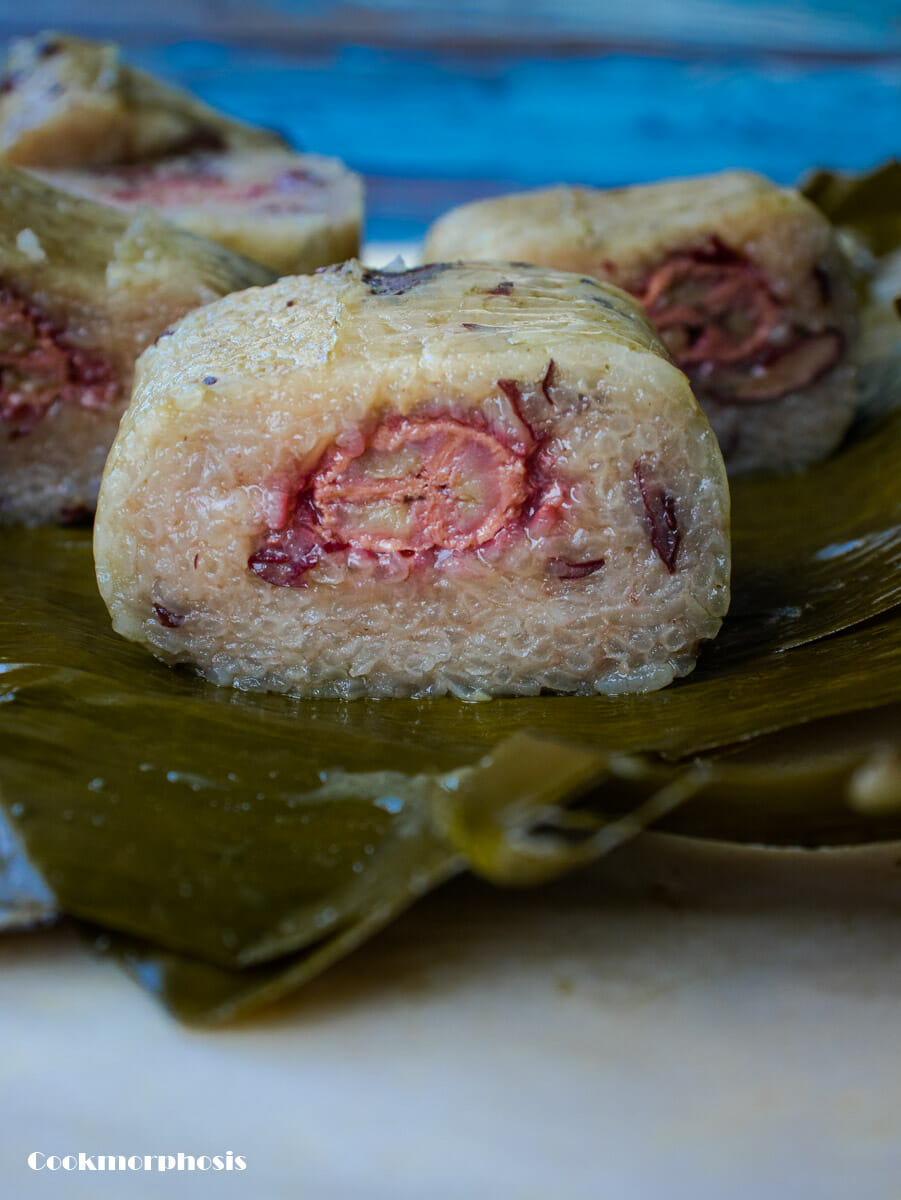
What is glutinous rice banana cake (Bánh tét chuối)?
This cake is one of the many famous Vietnamese traditional cakes. Unlike its sister meaty version, this vegan cake is often seen all year round.
The cake is made with glutinous rice (sticky rice - gạo nếp), beans, ripened bananas, and coconut milk. Then it is wrapped tightly (as much as possible) in many layers of banana leaves.
Last but not least, it is cooked in boiling water from 4 to 5 hours as opposed to its meaty version, which can take anywhere from 9 to 10 hours.
So this bánh tét chuối is a perfect option for anybody who wants to enjoy cooking holiday food while having less time on their hands.
Essential ingredients
- Glutinous rice - or sticky rice/Thai sticky rice (gạo nếp) is the main ingredient of this traditional Vietnamese holiday cake. The three lady brand is famous among the Asian community though you can use any other preferred brand. And please don't use regular rice for this cake, or you will find your cake wrapped in mushy congee texture.
- Coconut milk - a little coconut milk goes a long way. This recipe will only need 1 can (13.5 fl.oz) and 1 can (13.5 fl.oz) for this recipe.
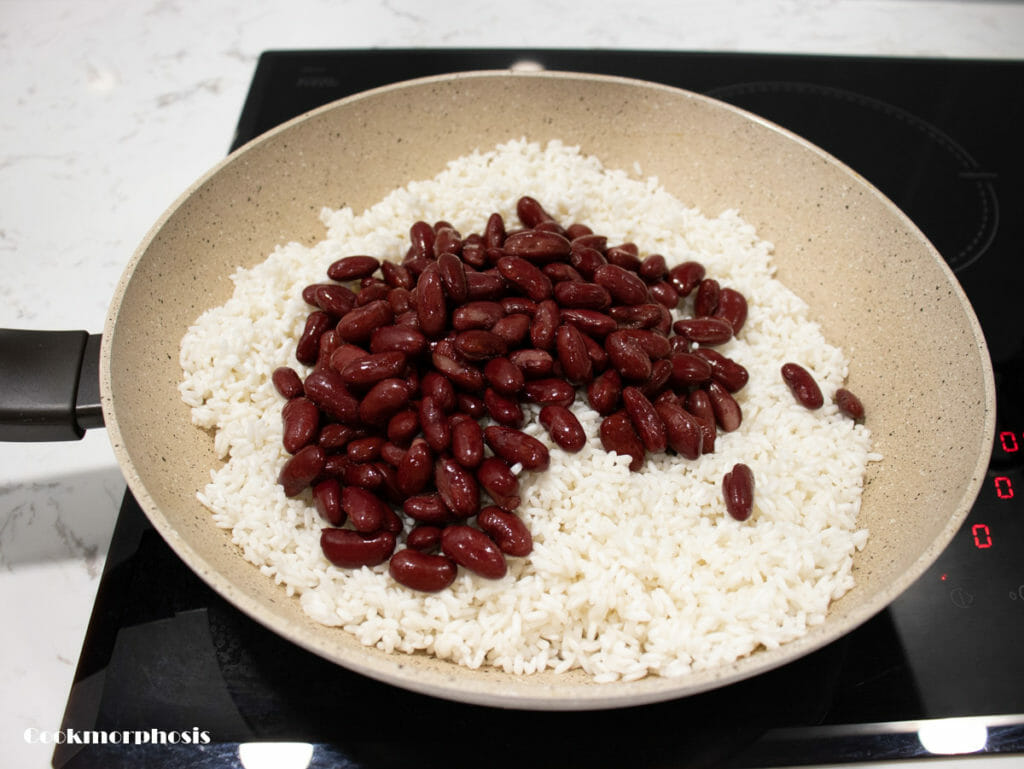
- Beans - traditionally, the cake is made with Vietnamese black or red beans. However, I found it's faster and more delicious when using canned kidney beans. I used red kidney beans, but feel free to switch it out for any kinds of kidney beans you like.
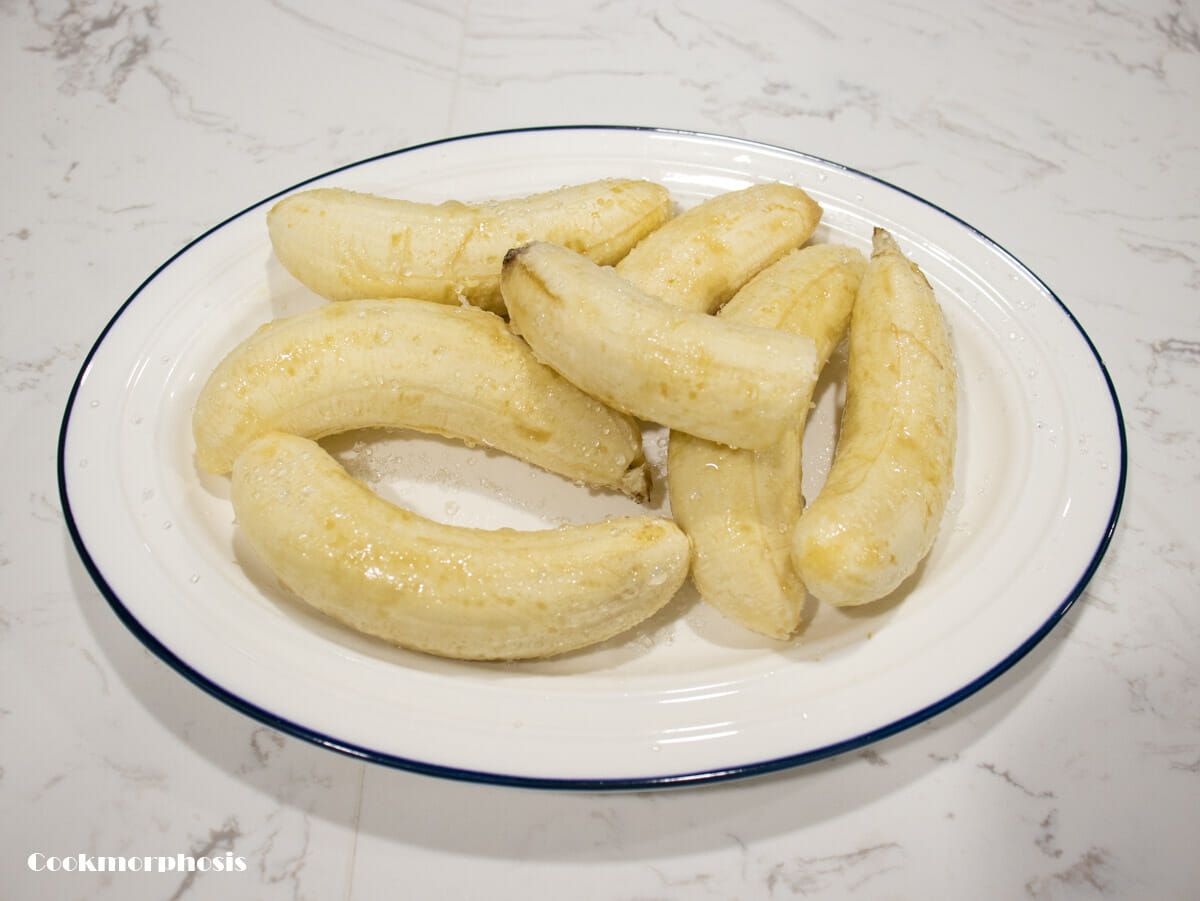
- Ripen banana - make sure your bananas are well-ripened for this cake; thus, most of the flavor (and fragrance) will come from these beautiful bananas.
- Pandan leaves - you can buy fresh pandan leaves at any Asian market. Or there is a dry version that can be bought on Amazon. If you use a dry version, please follow the package instructions before incorporating it into the recipe.
- Banana leaves - frozen banana leaves can be found in the Asian market, or you can buy fresh banana leaves on Amazon.
- Sugar & salt - like other recipes, we need something for seasoning. This cake is supposed to be on the sweet side, so sugar is used generously.
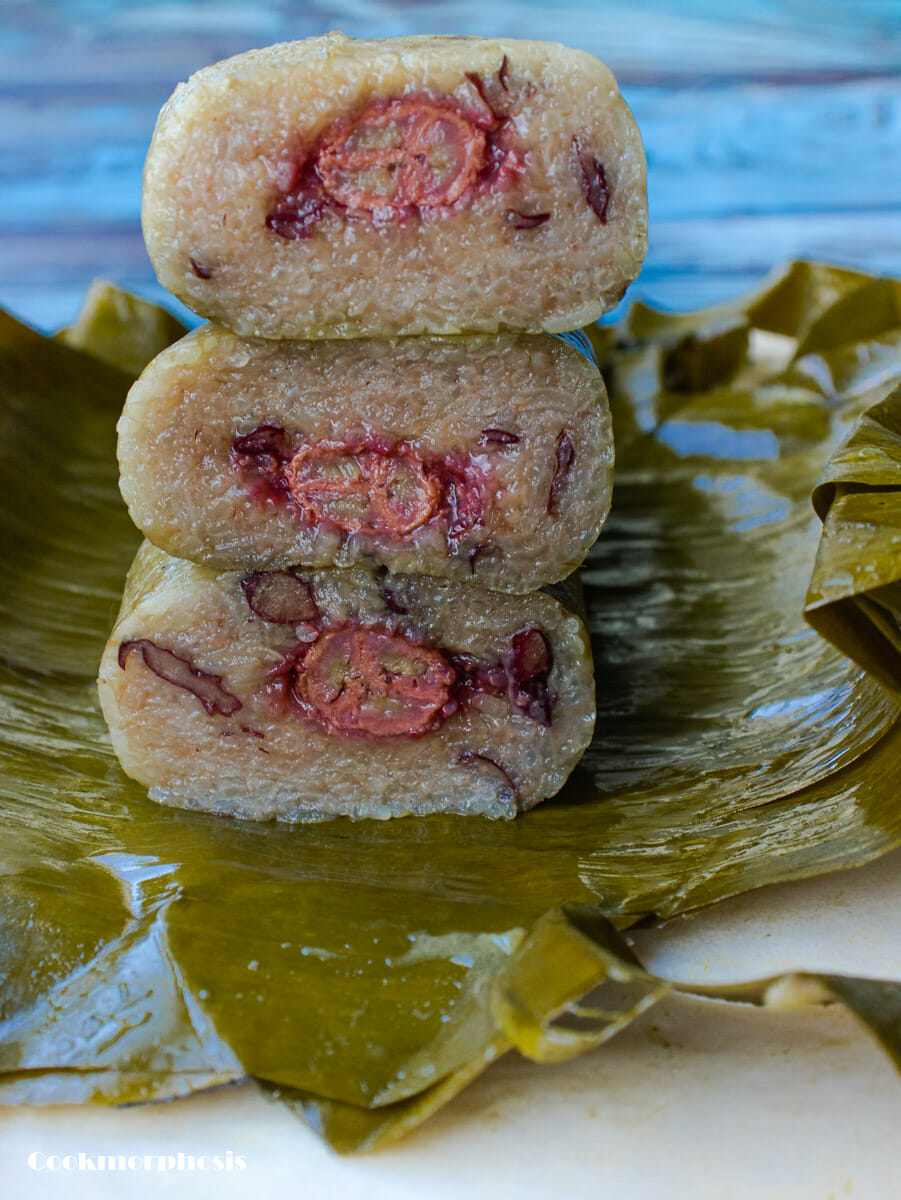
Step-by-step instruction (Cách làm bánh tét chuối)
*** Disclaimer: I'm not a professional Bánh tét chuối maker; this process is what exactly I do at home for my homemade bánh tét chuối, so please don't make it a big deal if it is not what you would do. I prefer using this style of wrapping because it's easier and helps me get this Vietnamese traditional holiday cake right every time ***
Prep the rice and banana leaves beforehand
- Soak glutinous rice 6 hours before cooking or soak it overnight.
- If using frozen banana leaves, thaw them in the refrigerator.
- Make sure you wash the leaves and soak them in water to soften them for a more straightforward wrapping process.
Season bananas
- 1 hour before cook time, lightly season bananas with just a little sugar.
Partially cook glutinous rice
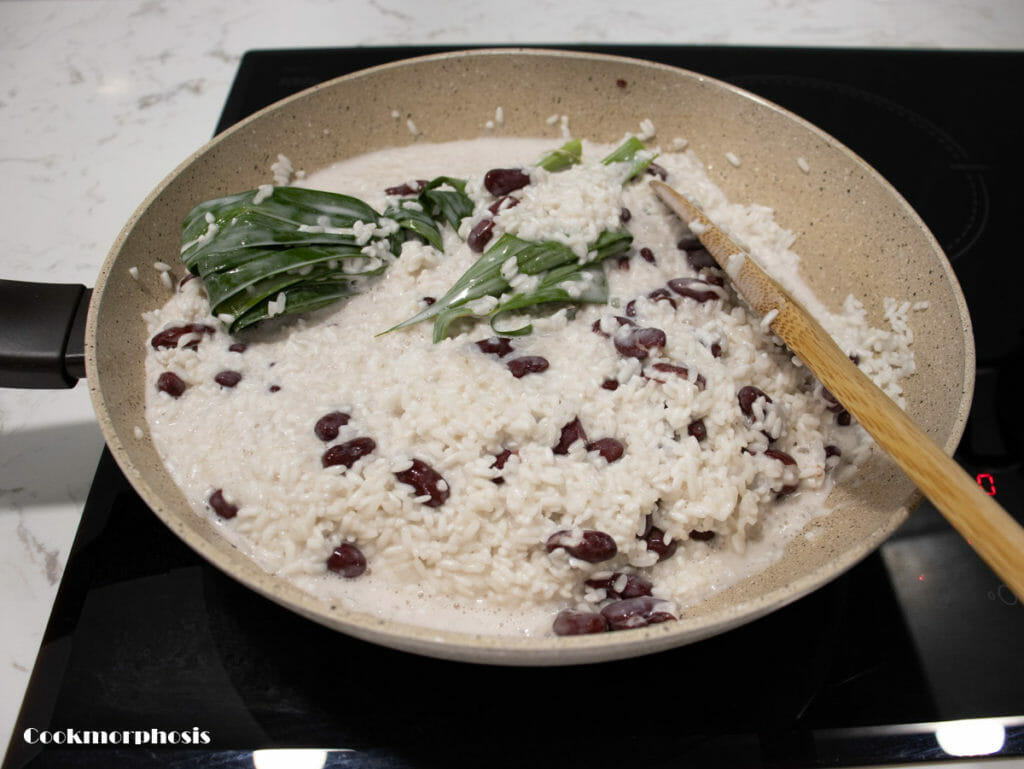
- In a large double bottom sauté pan over medium heat, combine glutinous rice and kidney beans, stir and cook for 2 minutes.
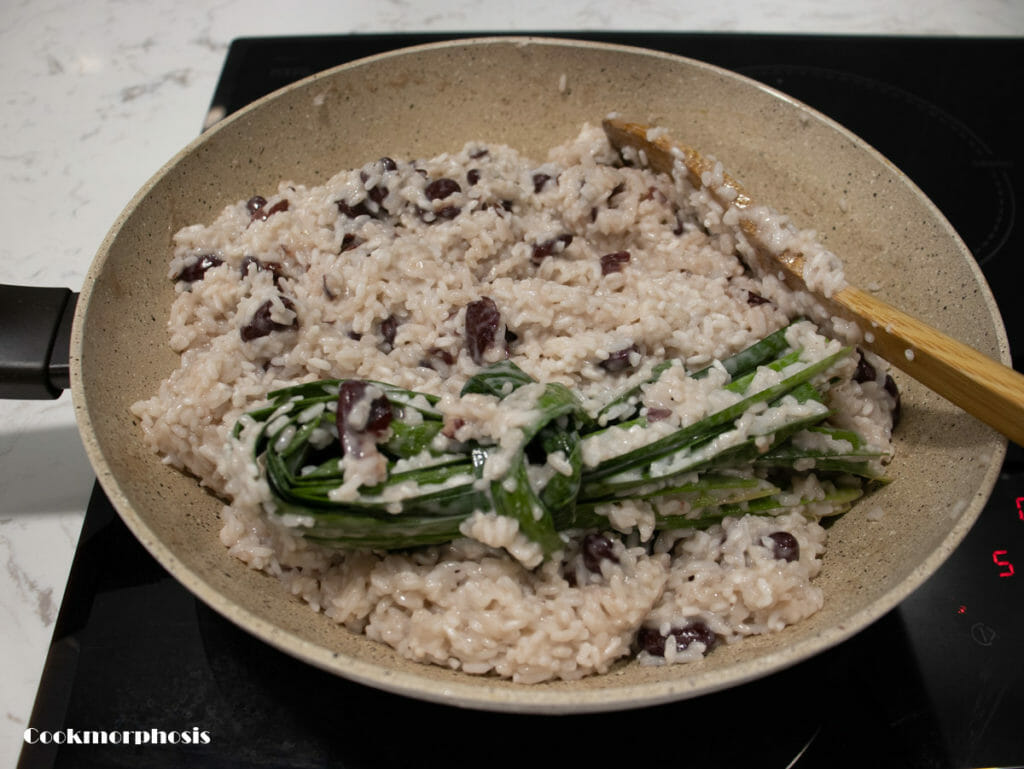
- Then add coconut milk and pandan leaves and continue cooking until the rice starts sticking together and there is not much coconut milk left. Season with sugar and salt. Stir constantly to prevent scorching on the bottom of the pan.
- Let the rice mixture cool down to room temperature and discard the pandan leaves before proceeding with the wrapping process.
Wrap glutinous rice banana cake
Portion rice, cut leaves and strings
- Use a sushi rolling mat or bamboo/wood type placemat to assist you with the shaping process. This is not a requirement; you can make this cake with just a clean surface.
- Have your butcher/cooking twine before proceeding any further. Cut at least 50-inch strings and four 10-inch strings, set aside for later use.
- Divide your rice mixture into four equal portions (in this recipe, I used approximately 8 oz of rice for each banana cake).
- Wipe banana leaves with a clean towel and cut them into 10 - 12 inches squares (at least 12 leaves).
- Cut another 16 12x2 inches leaves and set them aside.
- You also need a rubber band to assist with the shaping process.
Rolling process
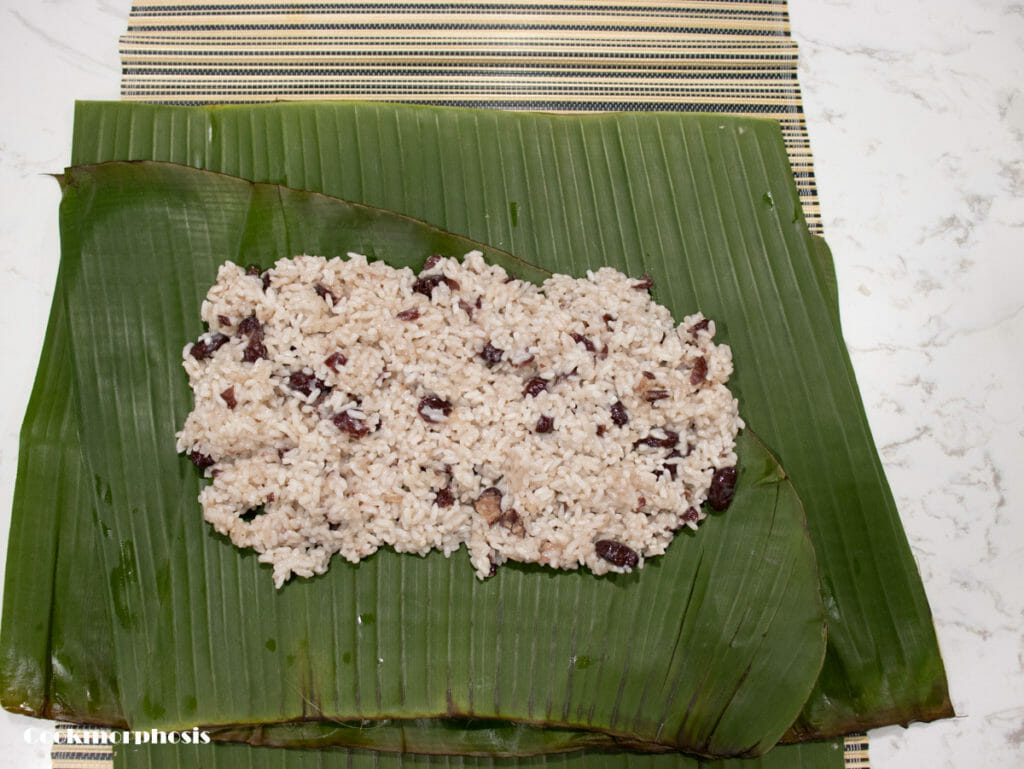
- Place three layers on a rolling mat or a clean flat surface on banana leaves.
- Spread half of a rice mixture portion in the middle of banana leaves, leaving at least 2 inches of banana leaves exposed for each side.
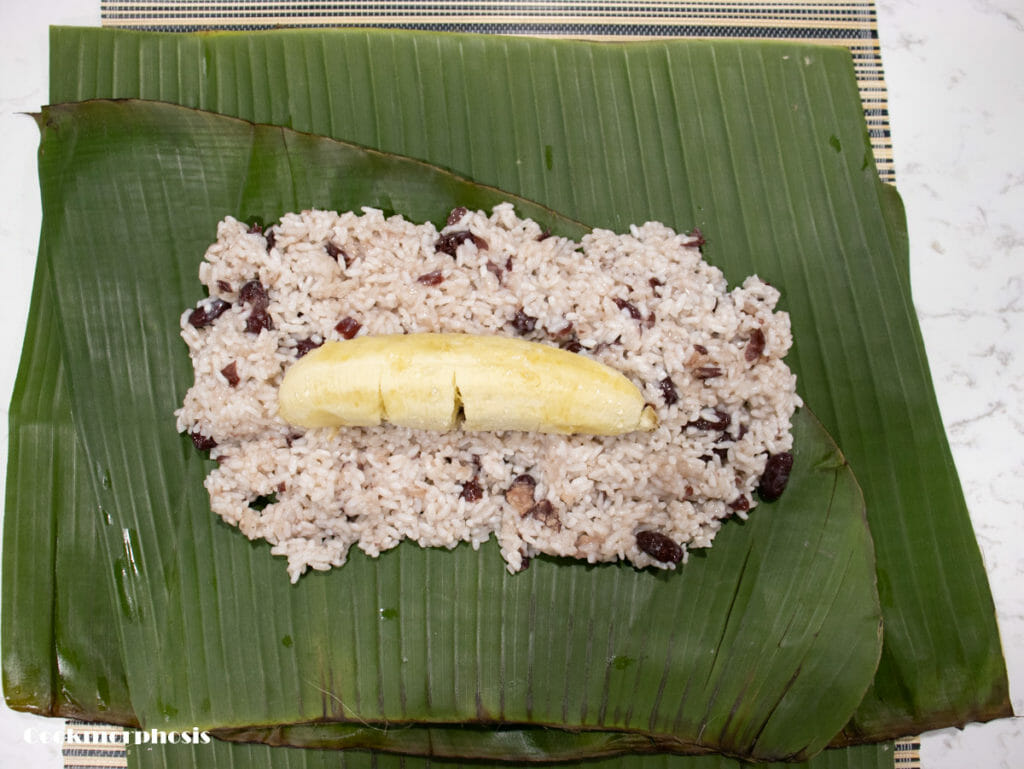
- Place one banana on the rice mixture and spread another half of the rice mixture over the banana.
- Use your hands to pick up two edges of banana leaves toward the middle and pin them together.
- Use the mat or just your hands to roll and shape the banana cake (bánh tét chuối) tightly into a log. Place the seam side down.
- Use a 4-inch string and tightly secure the log in the middle.
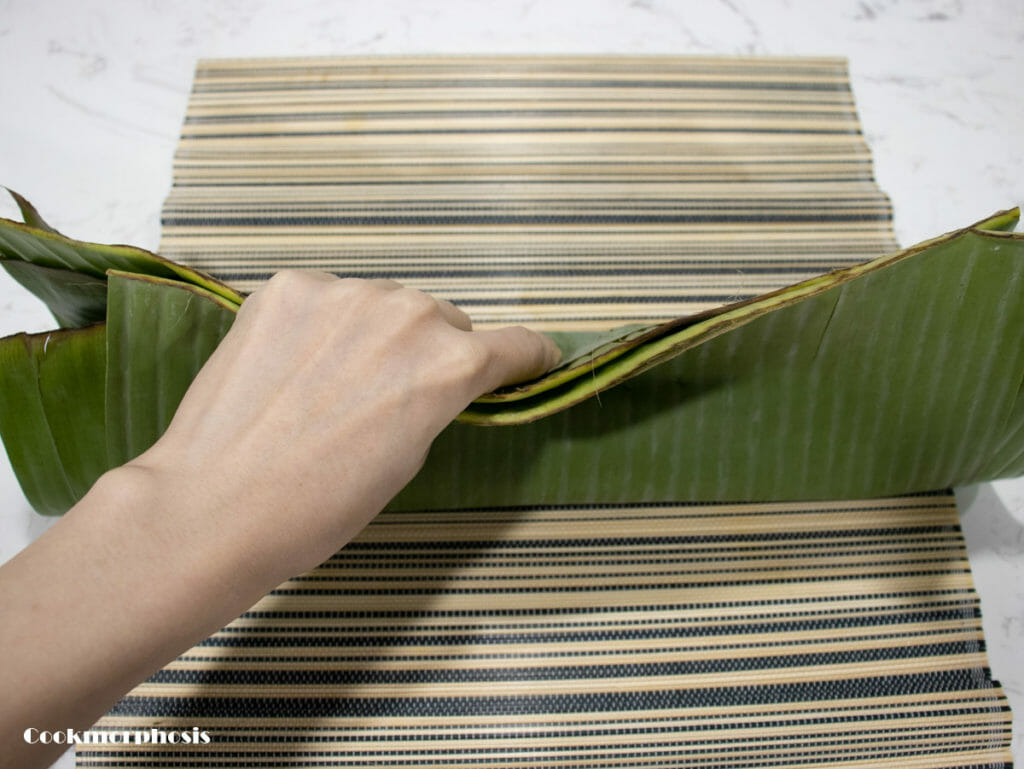
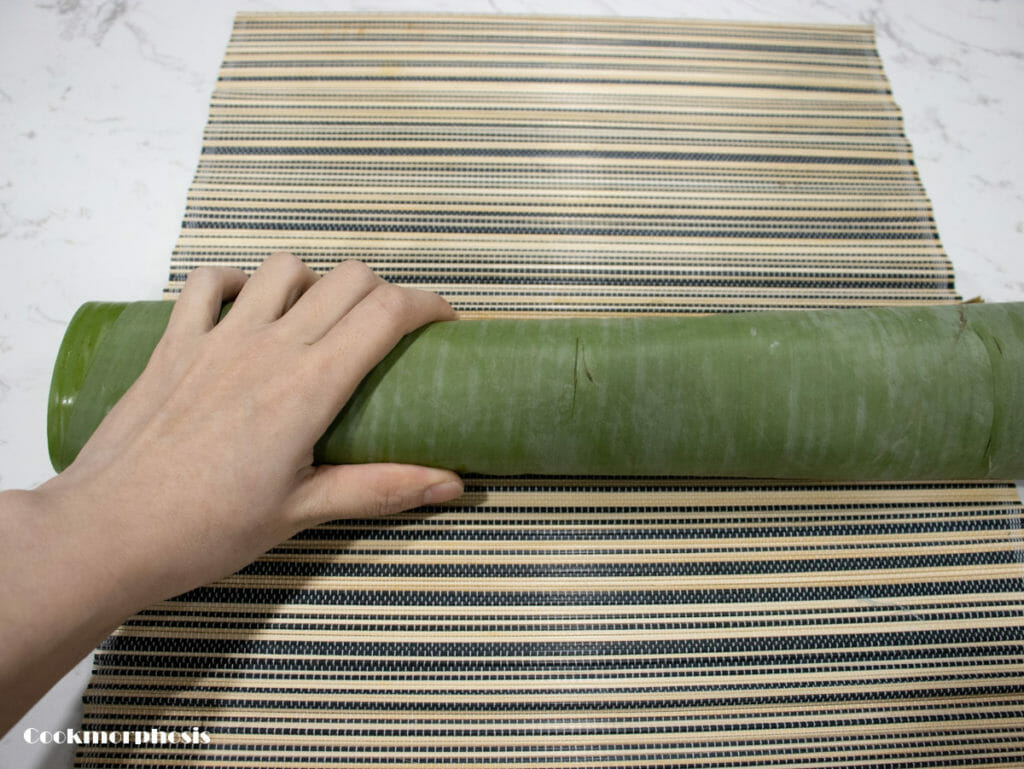
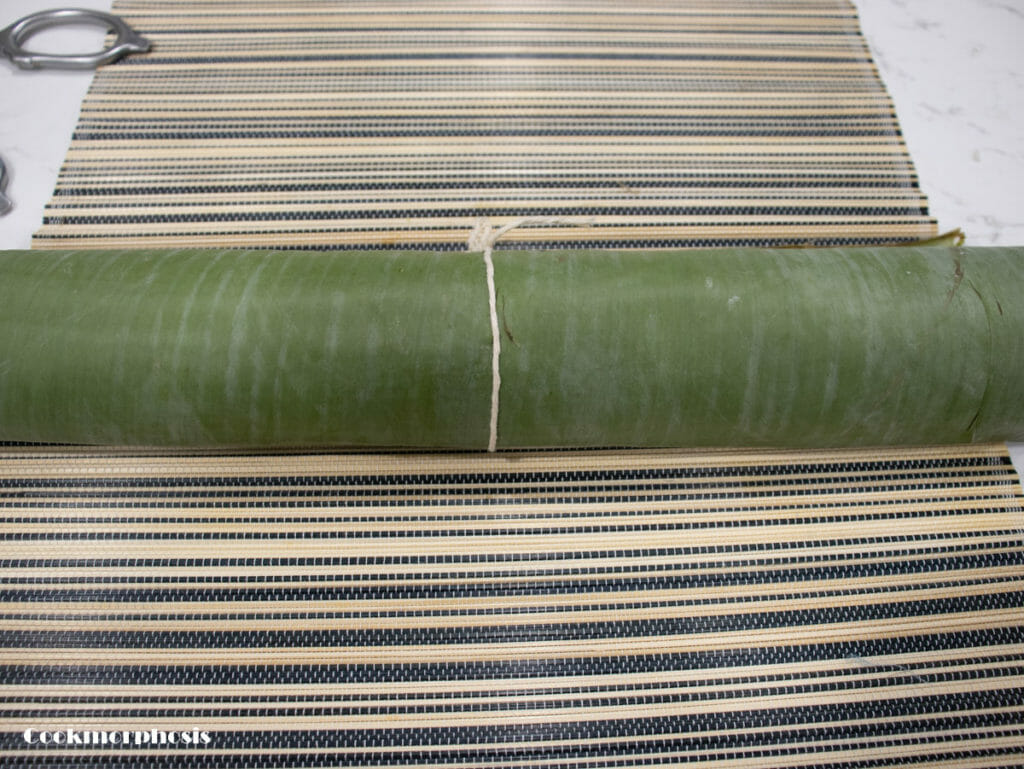
Shaping process
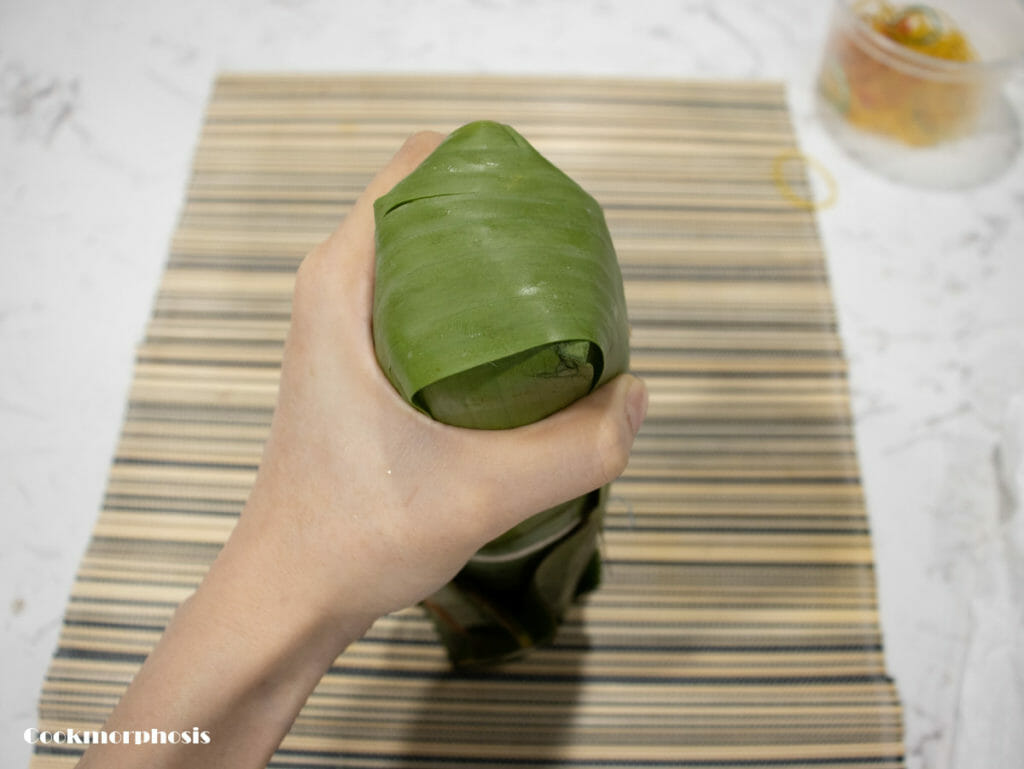
- Fold one end and put the log vertically with an opened end upward.
- Use a spoon that can fit perfectly inside the log, push the rice mixture tightly down and carefully shape them into a square shape if possible.
- Fold the edges as you wrap at the end of a gift box. Use a scissor to cut the leave for easier shaping if necessary.
- Use two 12x2 leaves, flap over this end, and then use a rubber band to secure the leave tightly.
- Repeat the steps with the other end. Try to limit the length of the cake to at most 8 inches.
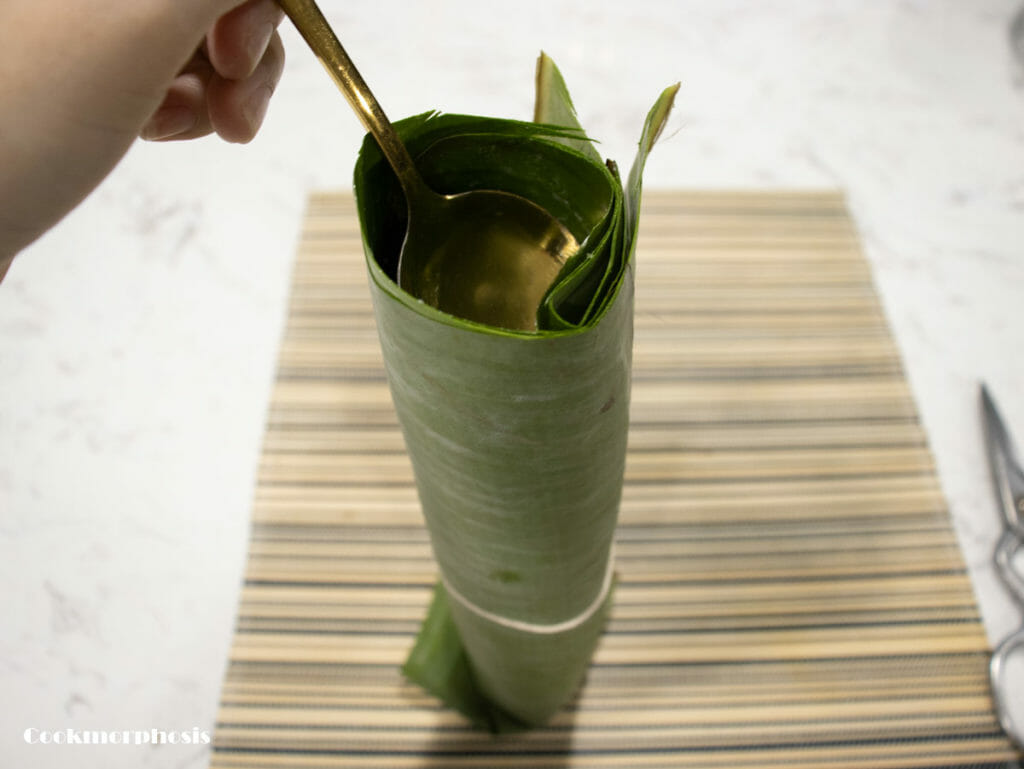
Tying process
You can apply two tying processes here: a traditional one and a half-hitch method. I'm using a half hitch method; this is most suitable for an 8-inch cake or shorter. Anything longer than that, the traditional tying process will be a better choice.
Half-hitch tying method
Use this for cake that has 8-inch length or less
- Wrap the loose end of a 50-inch string around the banana cake log and tie it with a double know. Leave at least 5-8 inches of string for a shorter end.
- Make a loop and slide it down over the cake to approximately 1 to 1.5 inches from the first knot.
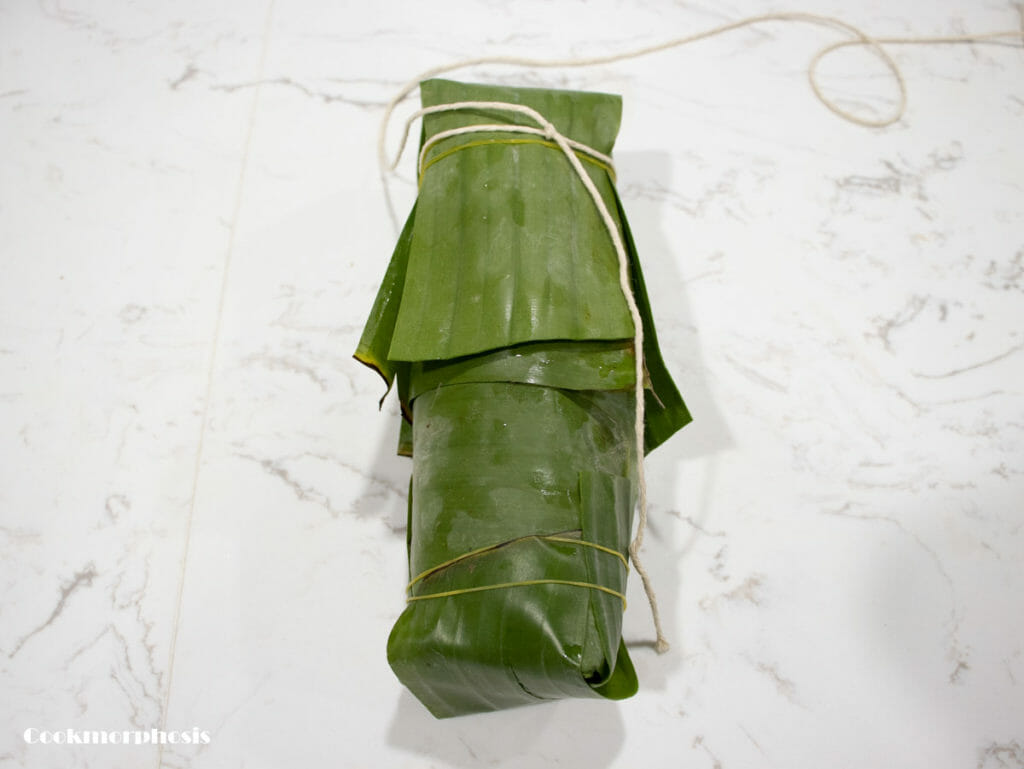
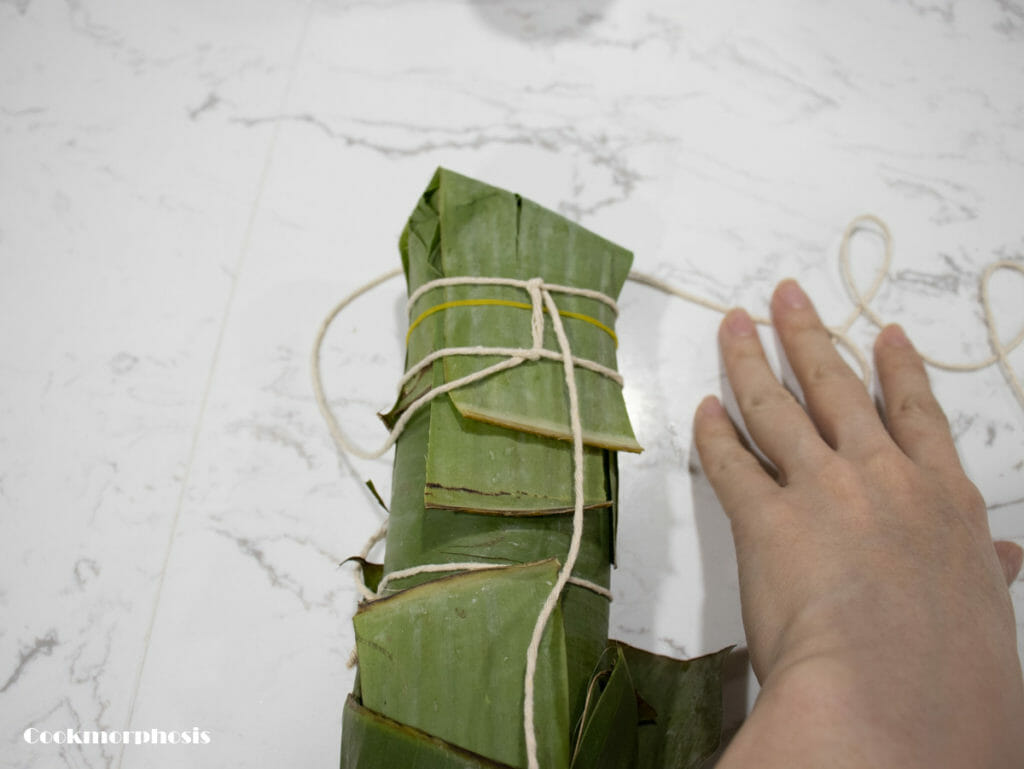
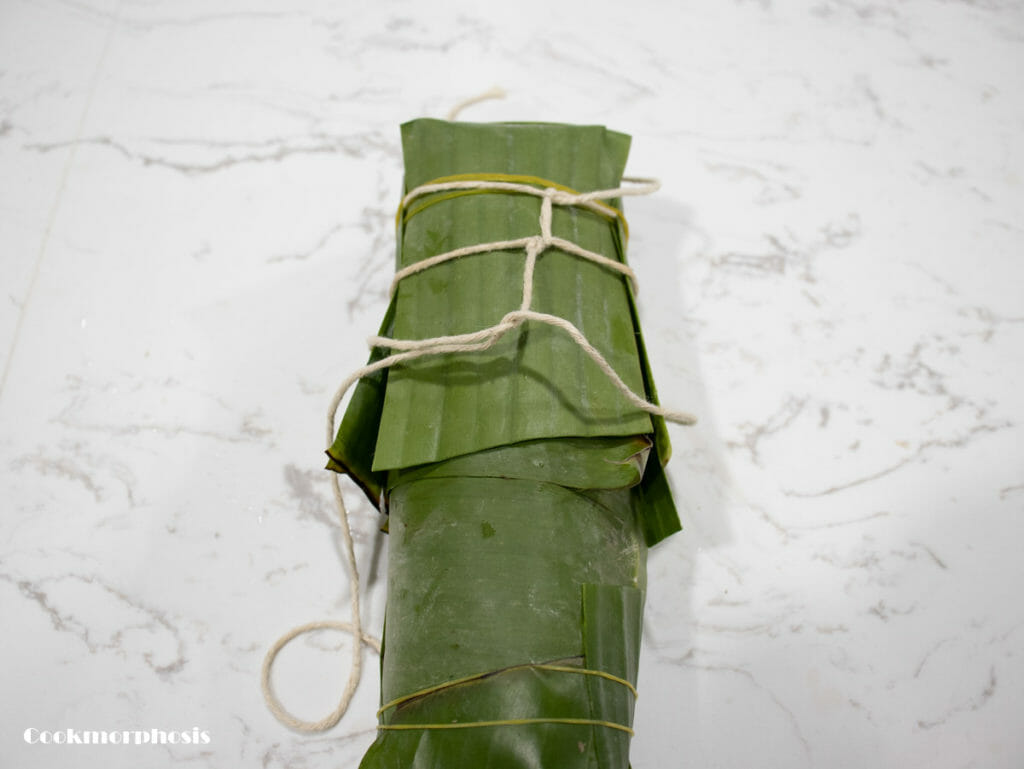
- Then tightly secure a know in the middle of the loop.
- Make another loop and slide it down. Continue looping and securing until the whole cake has been tied.
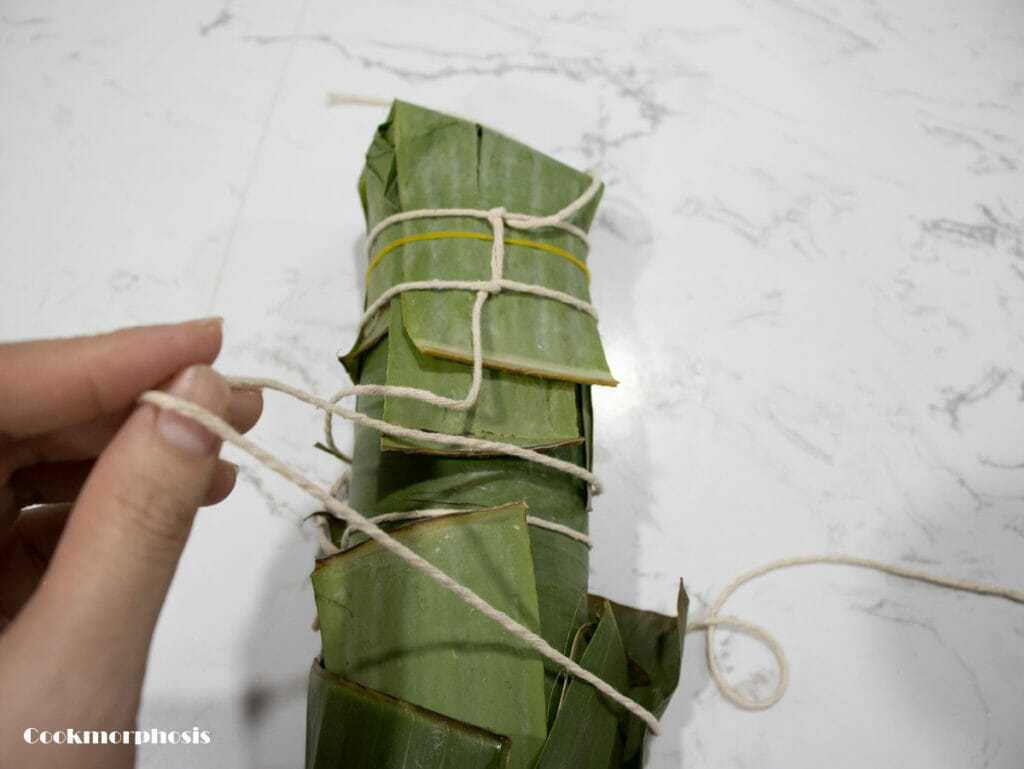
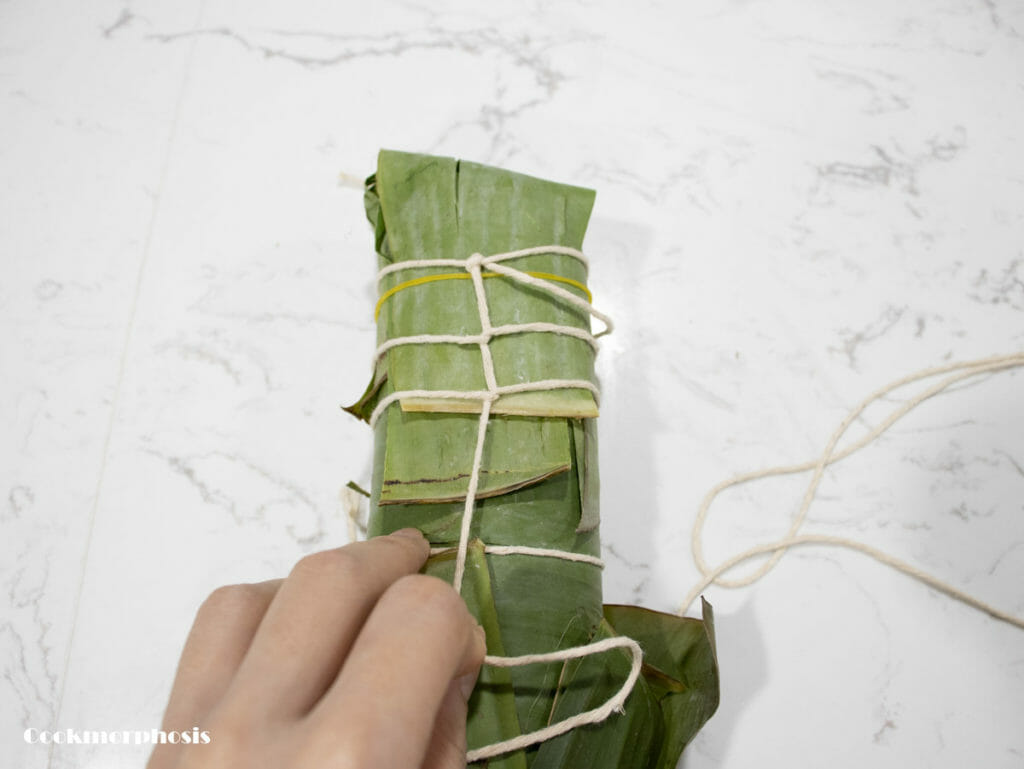
- Turn the cake over and wrap the string around the end of the cake, then around the string that formed the last loop.
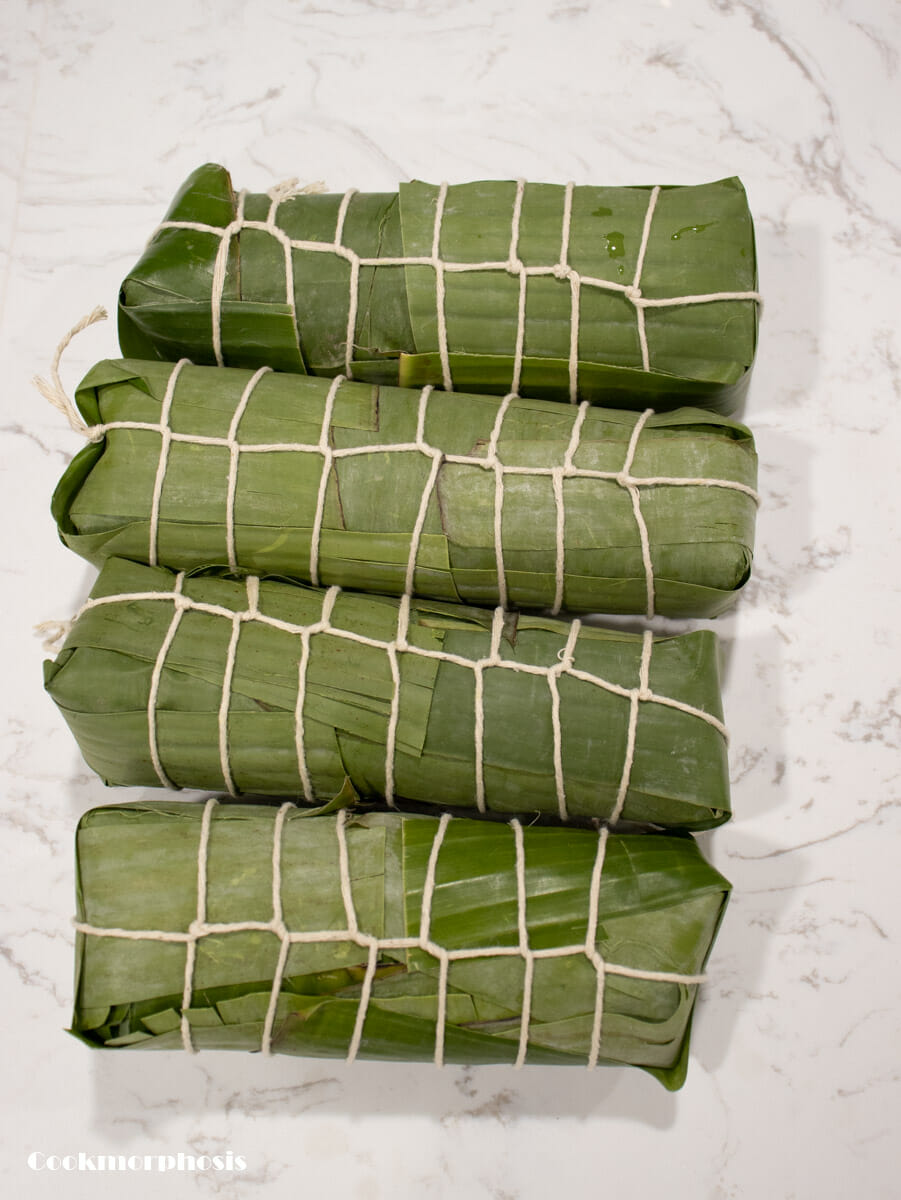
- Continue doing this process for the entire length of the cake log. Remember pulling the string tightly after wrapping it around each loop.
- Turn the log back over. Wrap the string around the front end of the cake ad secure it to the first loop at the point where you tide your first knot. Trim the ends of the strings if necessary.
Traditional tying method
Use this for any Vietnamese traditional holiday cake that is longer than 8 inches.
- Cut 8 to 10 strings long enough to wrap completely around the cake log.
- Hold one end between the thumb and forefinger, pass the other end around it and across the strings.
- Loop the loose end of the string around your finger.
- Wrap the string and pass the loose end back through the hole.
- Pull and tighten the knot securely on the cake log.
- Tight another know on top of the first knot to prevent it from losing. Trim the ends of the strings if necessary.
- Continue with the rest of the strings until the entire cake log is tied.
Cooking process
- To prevent water from coming into the cake during the cooking process, I recommend you to wrap each log with plastic wrap and then double wrap with aluminum foil on the outside before boiling them in water.
- Use a big soup pot; put the cake vertically (preferred) or horizontally, depending on the size of your pot. Fill the pot with water and ensure all the banana cakes are entirely submerged under water (ideally at least 2 inches).
- Bring to boil, cover the pot, and adjust the heat, so the water is still hard-boiling but not spilling all over the place.
- Check the pot and fill with hot-boiling water if the water level drops below the cakes every 1.5 hours.
- The banana cakes (bánh tét chuối) should be made after 4 hours or max 5 hours; you'll be able to smell the banana and coconut milk at this point.
- Let the cakes cool down to room temperature before serving, approximately 2 hours.
How long can I keep glutinous rice banana cake (bánh tét chuối) for?
Cooked bánh tét chuối can be kept at room temperature in a cool, dry place and away from direct sunlight for three days.
They can be kept in the chiller for up to 5 days and microwaved for 1-2 minutes before serving.
Or bánh tét chuối in the freezer for up to 2 months. Thaw them in the chiller and heat with a microwave before serving.
Related recipes
Looking for more traditional Vietnamese dessert-like & banana-related recipes? Here are a few recommendations:
- Super soft homemade moist banana bread.
- Easy homemade banana coconut ice cream on a stick.
- Sweet dessert drink assorted beans in coconut milk.
- One of a kind coconut taro steamed layered cake (bánh da lợn).
Did you make this recipe? If so please leave a rating and let me know how it went in the comment section. Also, don't forget to tag me #cookmorphosis @cookmorphosis on social media.
Vegan glutinous rice banana cake - Bánh tét chuối
Equipment
- 1 large pot
- Cooking twine
- Sushi rolling mat (optional)
- Scissors
- Rubber bands
Ingredients
- 2 lb glutinous rice
- ½ can coconut milk 13.5 oz can
- 7 pandan leaves wash and tight securely together
- 1 c red kidney beans 15-oz can
- ½ c sugar
- ½ tsp salt
- 4 bananas overripe
Instructions
Prep the rice and banana leaves
- Soak glutinous rice at least 6 hours before cooking time or soak it overnight.
- If using frozen banana leaves, thaw them in the refrigerator as well.
- Ensure you wash the leaves and soak them in water to soften them for a more straightforward wrapping process.
Season bananas
- One hour before cook time, lightly season bananas with just a little sugar.
Partially cook glutinous rice
- In a large double bottom sauté pan over medium heat, combine glutinous rice and kidney beans, stir and cook for 2 minutes.
- Then add coconut milk and pandan leaves and continue cooking until the rice starts sticking together and there is not much coconut milk left—season with sugar and salt. Stir constantly to prevent scorching on the bottom of the pan.
- Let the rice mixture cool down to room temperature and discard the pandan leaves before proceeding with the wrapping process.
Portion rice, cut banana leaves and strings
- Cut at least four 50-inch strings and four 10-inch strings, and set them aside for later use.
- Divide your rice mixture into four equal portions (in this recipe, I used approximately 8 oz of rice for each banana cake).
- Wipe out banana leaves with a clean towel and cut them into 10 – 12 inches squares (at least 12 leaves).
- Cut another 16 12×2 inches leaves and set them aside.
Rolling process
- Place three layers of banana leaves on a rolling mat or a clean flat surface.
- Spread half of a rice mixture portion in the middle of banana leaves, leaving at least 2 inches of banana leaves exposed for each side.
- Place one banana on the rice mixture and spread another half of the rice mixture over the banana.
- Use your hands to pick up two edges of banana leaves toward the middle and pin them together.
- Use the mat or your hands to roll and tightly shape the banana cake (bánh tét chuối) into a log. Place the seam side down.
- Use a 4-inch string and tightly secure the log in the middle.
Shaping process
- Fold one end and put the log vertically with an opened end upward.
- Use a spoon that can fit perfectly inside the log, push the rice mixture tightly down and carefully shape them into a square shape if possible.
- Fold the edges like you would wrap an end of a gift box. Use a scissor to cut the leave for easier shaping if necessary.
- Use 2 12×2 leaves, flap over this end, and then use a rubber band to secure the leave tightly.
- Repeat the steps with the other end. Try to limit the length of the cake to at most 8 inches.
Tying process: the half-hitch method (see notes for traditional tying method)
- Wrap the loose end of a 50-inch string around the banana cake log and tie it with a double know. Leave at least 5-8 inches of string for a shorter end.
- Make a loop and slide it down over the cake to approximately 1 to 1.5 inches from the first knot.
- Then tightly secure a know in the middle of the loop.
- Make another loop and slide it down. Continue looping and securing until the whole cake has been tied.
- Turn the cake over and wrap the string around the end of the cake, then around the string that formed the last loop.
- Continue doing this process for the entire length of the cake log. Remember pulling the string tightly after wrapping it around each loop.
- Turn the log back over. Wrap the string around the front end of the cake ad secure it to the first loop at the point where you tide your first knot. Cut and discard rubber bands. Trim the ends of the strings if necessary.
Cooking process
- To prevent water from coming into the cake during the cooking process, I recommend you to wrap each log with plastic wrap and then double wrap with aluminum foil on the outside before boiling them in water.
- Use a big soup pot, and put the cake vertically (preferred) or horizontally, depending on the size of your pool. Fill the pot with water and ensure all the banana cakes are entirely submerged under water (ideally at least 2 inches).
- Bring to boil, cover the pot, and adjust the heat, so the water is still hard-boiling but not spilling all over the place.
- Check the pot and fill it with hot-boiling water if the water level drops below the cakes every 1.5 hours.
- The banana cakes (bánh tét chuối) should be made after 4 hours or 5 hours; you’ll be able to smell the banana and coconut milk at this point.
- Discard the plastic wrap and aluminum foil. Let the cakes cool down to room temperature approximately 2 hours before serving.
Notes
Traditional tying method
Use this for any Vietnamese traditional holiday cake longer than 8 inches.- Cut 8 to 10 long enough strings to wrap entirely around the cake log.
- Hold one end between the thumb and forefinger, pass the other end around it and across the strings.
- Loop the loose end of the string around your finger.
- Wrap the string and pass the loose end back through the hole.
- Pull and tighten the knot securely on the cake log.
- Tight another know on top of the first knot to prevent it from losing. Trim the ends of the strings if necessary.
- Continue with the rest of the strings until the entire cake log is tied.
Storing bánh tét chuối
Cooked bánh tét chuối can be kept at room temperature in a cool, dry place and away from direct sunlight for three days. They can be kept in the chiller for up to 5 days and microwaved for 1-2 minutes before serving. Or bánh tét chuối in the freezer for up to 2 months. Thaw them in the chiller and heat with a microwave before serving.Nutrition
Did you make this recipe? If so please leave a rating and let me know how it went in the comment section. Also, don't forget to tag me #cookmorphosis @cookmorphosis on social media.

Leave a Reply